WINDOW 11

100 percent Disk Usage in Windows 11 – Fix High Disk Usage Issue

8 SOLUTIONS
FEBRUARY 07, 2025

Is your Windows 11 PC freezing or lagging because the disk is stuck at 100% usage? Don’t panic—this isn’t a dead end. Most high disk usage issues boil down to a handful of culprits: outdated drivers, background apps hogging resources, or even a failing hard drive.

Deepak Yadav
Deepak Yadav

Expert, Head of Windows Circle

Keep Backup

Backup of important files (use a USB drive or cloud storage).

Update Windows

Go to Start > Settings > Windows Update > Check for updates. Install all pending updates

Identify High Usage Apps

Press Ctrl + Shift + Esc. Click the Disk column to identify high-usage apps.

Disable SysMain (SuperFetch)

4 STEPS EASY 2 MIN

1/8

METHOD
Method 1
Overview

SysMain preloads apps into memory but strains older HDDs.

Method 1 of 8
Next Method

Open Services

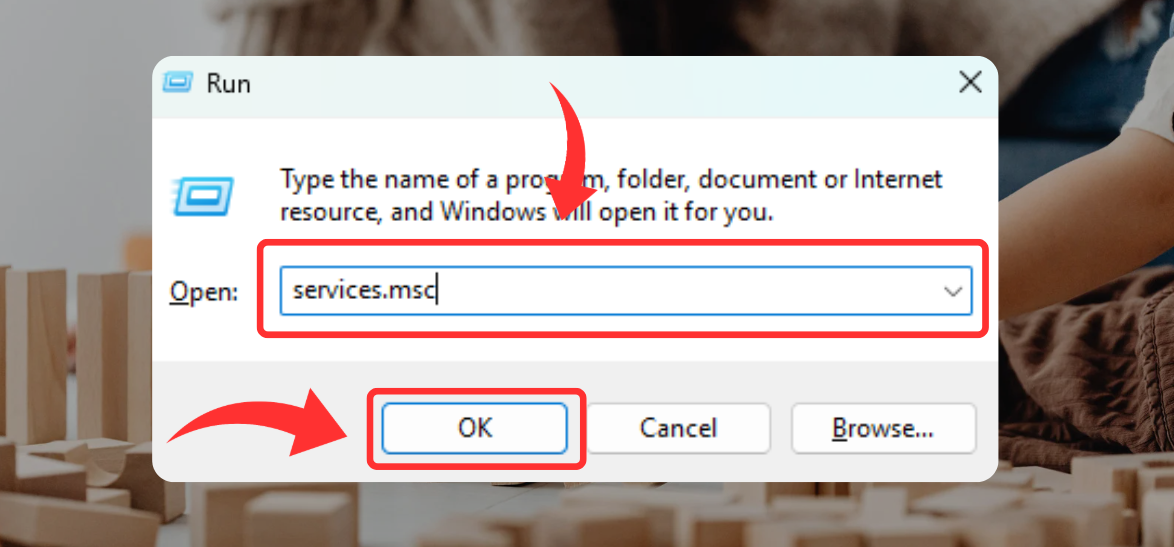
Press Win + R, type services.msc, and press Enter.

Method 1 of 8
Step 1 of 4

Locate SysMain

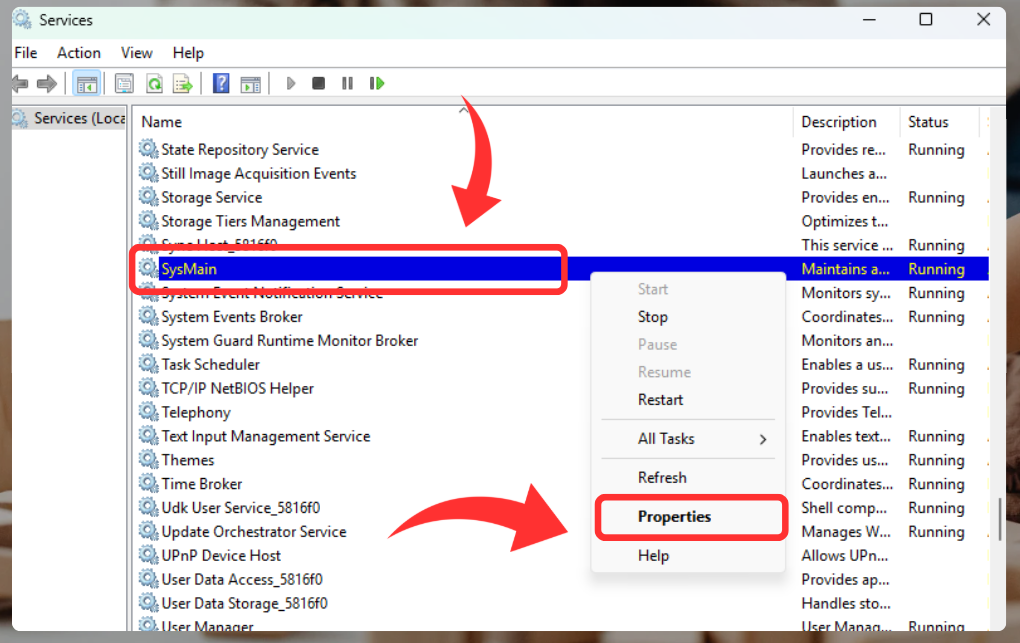
Scroll down, right-click SysMain, and select Properties.

Method 1 of 8
Step 2 of 4

Disable the Service

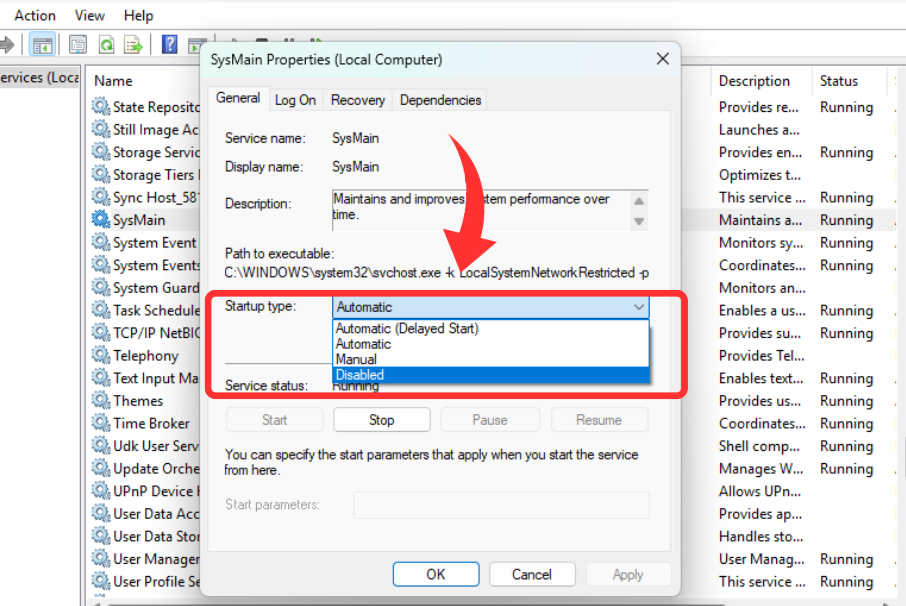
Set Startup type to Disabled.

Method 1 of 8
Step 3 of 4

Stop the Service

Click Stop (if active), then click Apply > OK.

Restart Your PC

Note: Skip this if you use an SSD.

Method 1 of 8
Step 4 of 4

Run a Malware Scan

2 STEPS EASY 2 MIN

2/8

METHOD
Method 2
Overview

Malware often hijacks disk resources silently.

Method 2 of 8
Next Method

Open Windows Security

Search for "Virus & threat protection" in the Start menu.

Method 2 of 8
Step 1 of 2

Start a Full Scan

Click Scan options > Full scan > Scan now.

If threats are found, click Quarantine and restart your PC.

Be Patient:: Running a scan may take some time to complete.

Method 2 of 8
Step 2 of 2

Adjust Virtual Memory Settings

4 STEPS EASY 2 MIN

3/8

METHOD
Method 3
Overview

Prevents excessive disk usage when RAM is overloaded.

Method 3 of 8
Next Method

Open Advanced System Settings

Search for View advanced system settings and open it.

Method 3 of 8
Step 1 of 4

Modify Virtual Memory

Go to Advanced > Settings (Performance) > Advanced > Change.

Method 3 of 8
Step 2 of 4

Set Custom Values

Uncheck Automatically manage.

Method 3 of 8
Step 3 of 4

Select Custom size and input

Initial: 1.5 × your RAM (e.g., 12288 MB for 8GB RAM).

Maximum: 2 × your RAM (e.g., 16384 MB for 8GB RAM).

Click Set > OK > Restart your PC.

Caution: Avoid setting values higher than 3× your RAM—it can worsen performance.

Method 3 of 8
Step 4 of 4

Update Disk Drivers

2 STEPS EASY 2 MIN

4/8

METHOD
Method 4
Overview

Outdated drivers can miscommunicate with hardware.

Method 4 of 8
Next Method

Open Device Manager

Press Win + X > Select Device Manager.

Method 4 of 8
Step 1 of 2

Find Your Disk

Expand Disk drives, right-click your disk, and select Update driver.

Choose Search automatically for drivers.

Restart Your PC & Reboot if updates are installed.

Note: Always check your disk manufacturer’s website for driver updates if Windows finds none.

Method 4 of 8
Step 2 of 2

Limit Background Apps

2 STEPS EASY 2 MIN

5/8

METHOD
Method 5
Overview

Apps like OneDrive or Teams drain disk resources.

Method 5 of 8
Next Method

Disable Startup Apps

Open Task Manager (Ctrl + Shift + Esc) > Go to Startup tab.

Method 5 of 8
Step 1 of 2

Disable Unnecessary Apps

Right-click unnecessary apps (e.g., Spotify) > Select Disable.

Method 5 of 8
Step 2 of 2

Check Disk for Errors

3 STEPS EASY 2 MIN

6/8

METHOD
Method 6
Overview

Physical disk issues can cause 100% usage.

Method 6 of 8
Next Method

Run CHKDSK

Open Command Prompt as admin (search > Run as administrator).

Method 6 of 8
Step 1 of 3

Execute Command

Type chkdsk /f /r > Press Enter > Type Y to approve.

Method 6 of 8
Step 2 of 3

Restart and Wait

Restart your PC. The scan runs automatically and repairs errors.

Remember: Replace HDDs older than 5 years—they’re prone to failure.

Method 6 of 8
Step 3 of 3

Switch to High-Performance Power Plan

4 STEPS EASY 2 MIN

7/8

METHOD
Method 7
Overview

Prevents HDD slowdowns caused by power-saving modes.

Method 7 of 8
Next Method
Step 1

Open Power Options

Go to Control Panel > Hardware and Sound > Power Options.

Method 7 of 8
Step 1 of 4

Select High Performance

Choose the High performance plan.

Method 7 of 8
Step 2 of 4

Edit Plan Settings (Optional)

Click Change plan settings > Change advanced settings.

Method 7 of 8
Step 3 of 4

Adjust Hard Disk Settings

Set Hard disk > Turn off after to Never.

Info: This step is unnecessary for SSD users.

Method 7 of 8
Step 4 of 4

Perform a Clean Boot

4 STEPS EASY 2 MIN

8/8

METHOD
Method 8
Overview

Identifies conflicting software causing disk spikes.

Method 8 of 8

Open System Configuration

Press Win + R, type msconfig, and press Enter.

Method 8 of 8
Step 1 of 4

Disable Services

Go to Services tab > Check Hide all Microsoft services > Click Disable all.

Method 8 of 8
Step 2 of 4

Disable Startup Apps

Open Task Manager > Startup tab > Disable all items.

Method 8 of 8
Step 3 of 4

Restart and Test

Restart your PC. If disk usage drops, re-enable services/apps one by one.

Remember: Common offenders include antivirus suites, VPNs, or outdated GPU drivers.

Method 8 of 8
Step 4 of 4

Additional Tips

Image

Replace HDDs with SSDs for instant performance gains

A recent Windows Update is causing issues. Try rolling it back.

Your hard drive is failing. Run CrystalDiskInfo to check for health issues.