How to fix Next & Previous Buttons Not Working in Windows 11
If your Next and Previous media keys aren't working, it's likely due to outdated drivers, system updates, or misconfigured settings. Here's a comprehensive guide to fix the issue.
If your Next and Previous media keys aren't working, it's likely due to outdated drivers, system updates, or misconfigured settings. Here's a comprehensive guide to fix the issue.
Right-click Start and select Device Manager.
Expand Keyboards and Human Interface Devices.
Right-click each device, select Properties, and go to the Driver tab.
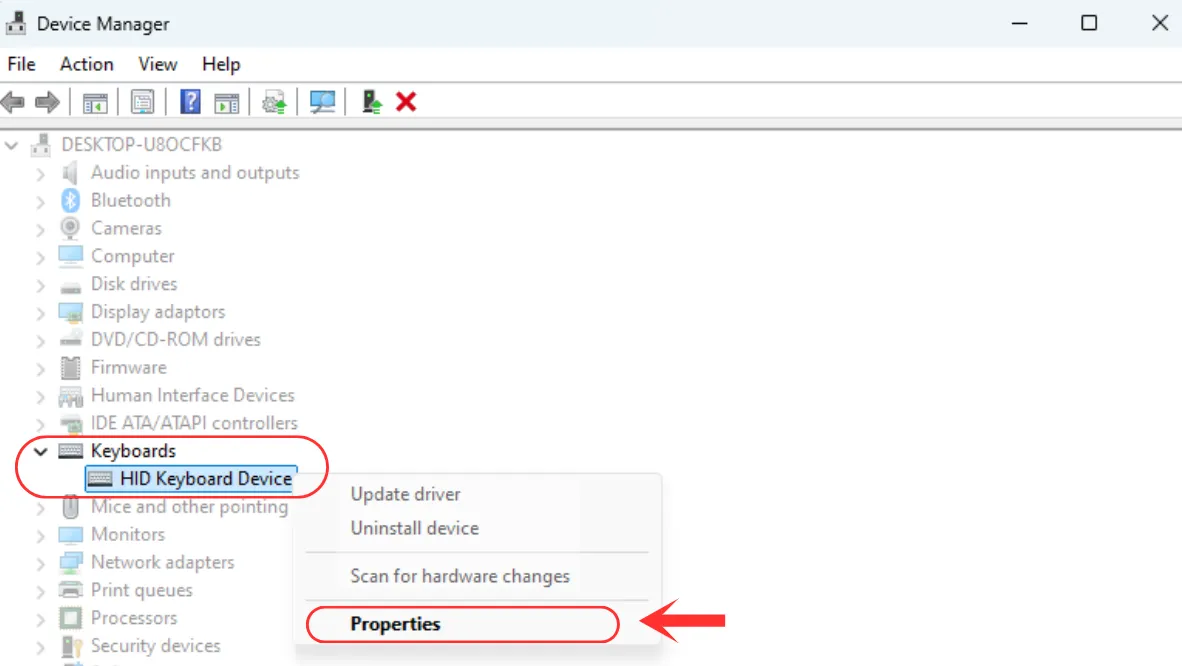
If the Driver Provider isn’t Microsoft, visit the provider’s website and update the drivers.
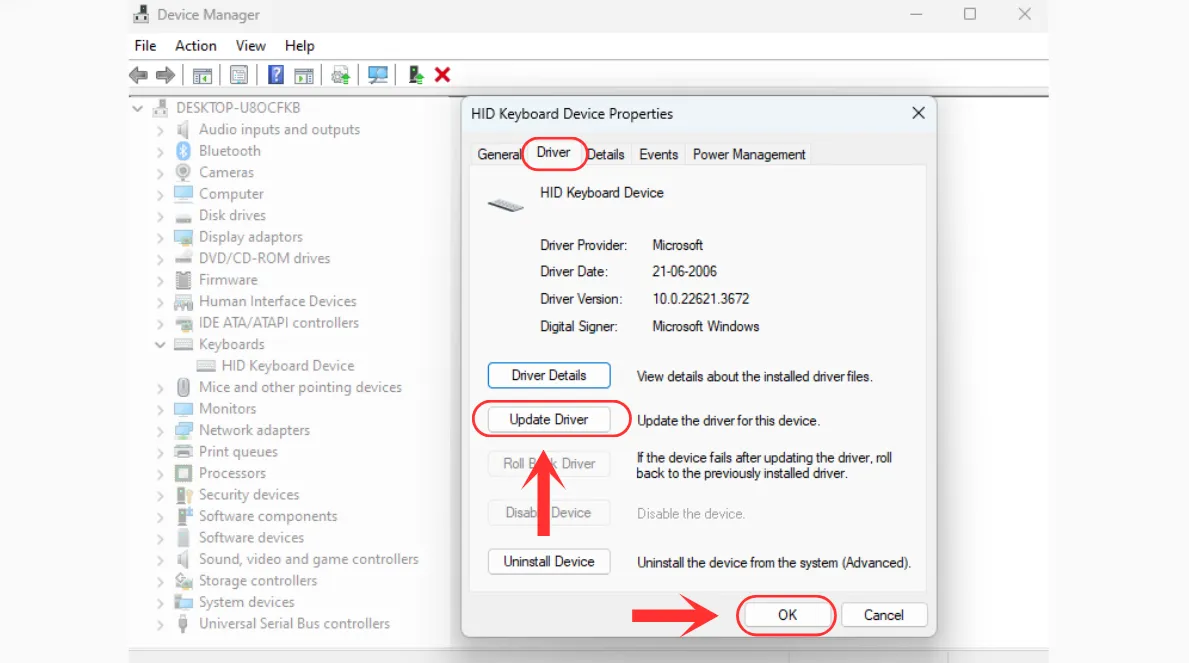
Some driver tools allow rollback. Roll back to the last date before the issue started.
Open Command Prompt as administrator.
Run sfc /scannow.
After that, run DISM /Online /Cleanup-Image /RestoreHealth.
Type pnputil /scan-devices and press Enter to force Windows to scan for devices.
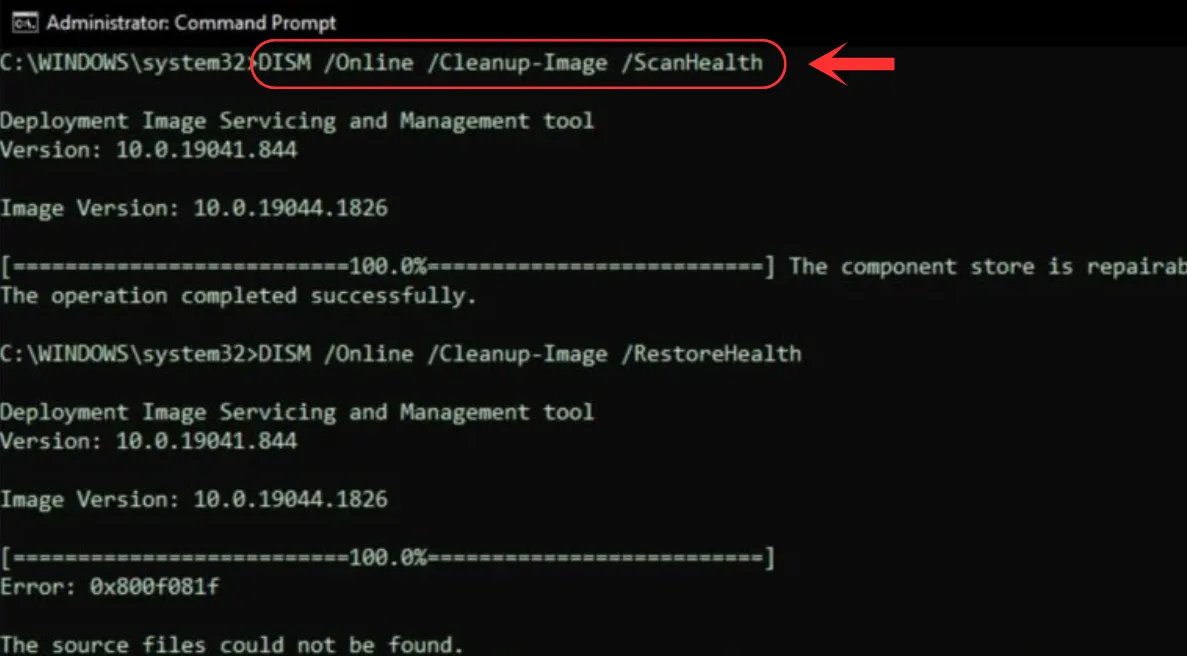
Restart your PC.
This method fixes corrupted system files that could be causing the issue.
Download and install Microsoft PowerToys.
Restart your computer, and when it’s booting up, press F2, Delete, or Esc (one of these will get you into BIOS).
Once you’re in the BIOS, look for something like Keyboard Emulation or Legacy USB Support. Flip the setting (turn it on if it’s off or vice versa).
Save the changes and exit. Your PC will restart.
Try enabling Keyboard Init in BIOS. This can help your computer recognize your keyboard properly.
Open up Device Manager, left click on view tab and switch the view to Resources by Connection.
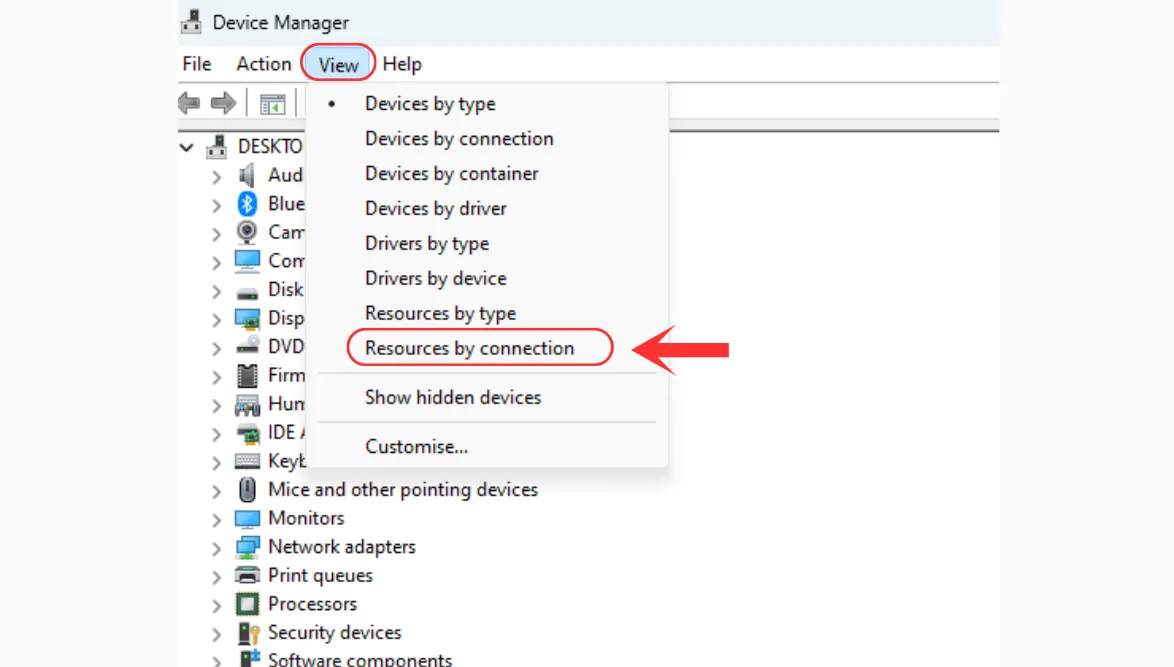
Now, check if there’s any conflict with the USB devices (like shared IRQs).
If there is, you can either change the IRQ settings in the BIOS or just plug your USB devices into different ports.
Open Event Viewer on your PC.
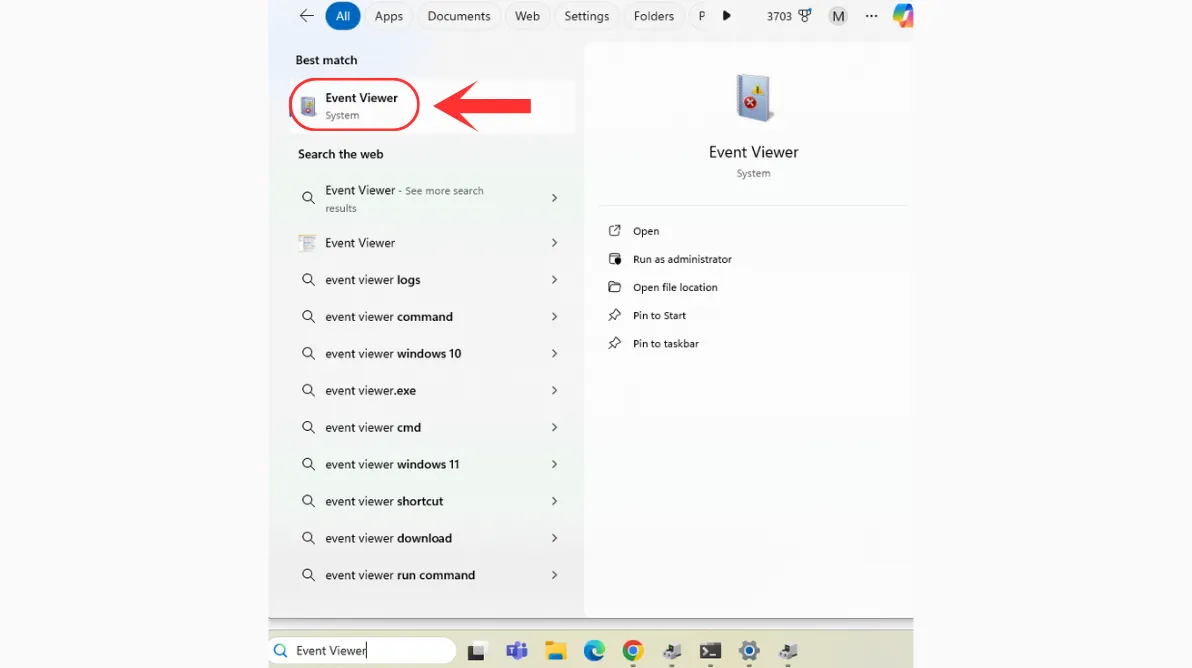
In the left panel, expand Windows Logs if it's not already expanded.
Click on System under Windows Logs.
In the middle panel, you'll see a list of events. Look for the System log, which is highlighted in blue in this image.
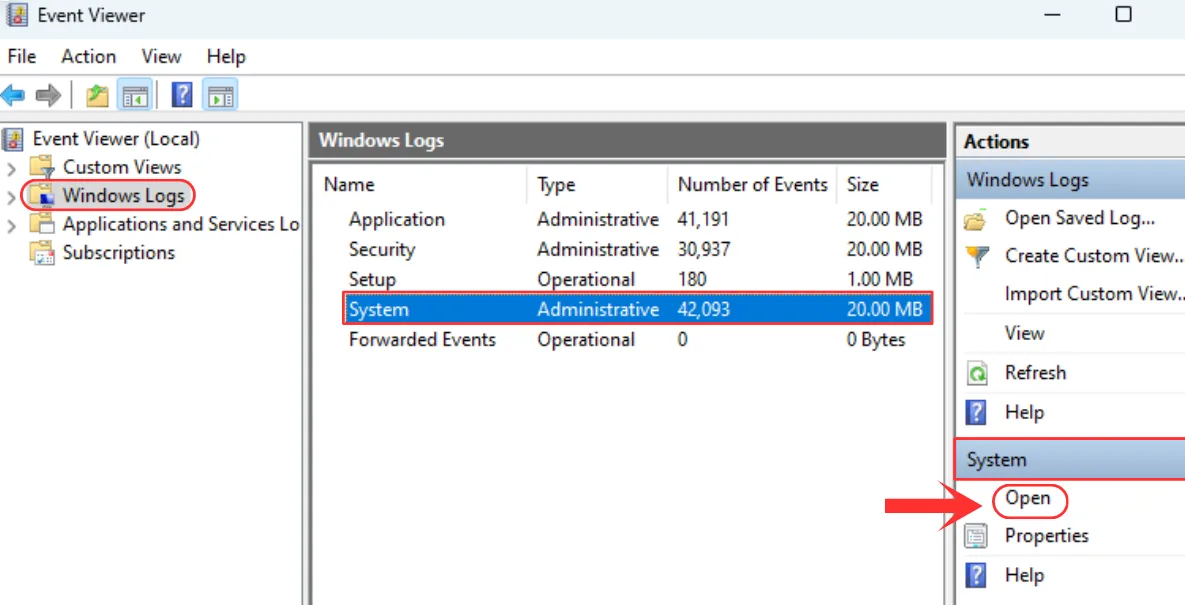
In the right panel, under Actions, you'll see a section labeled System.
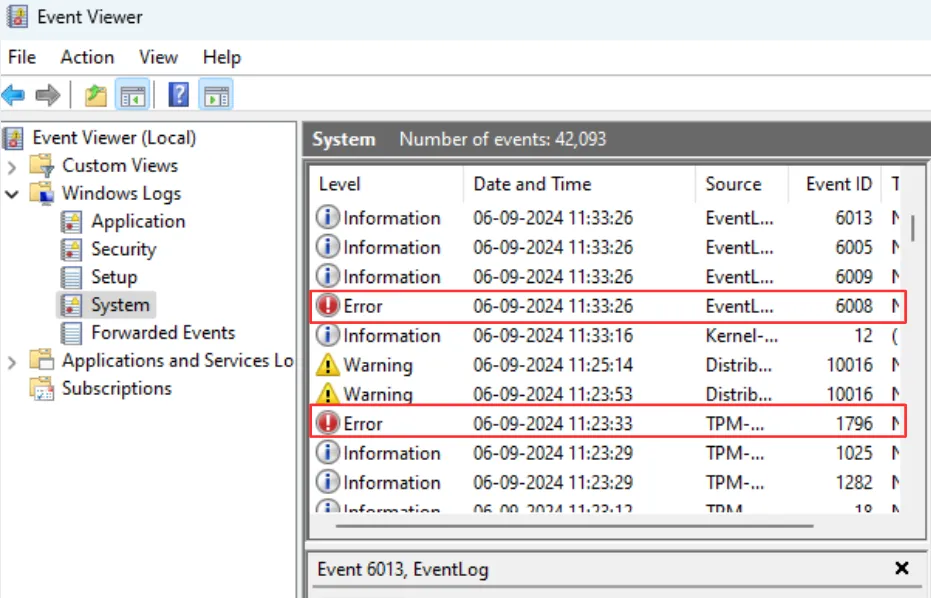
Now, investigate potential HID or USB device errors:
Open Notepad and paste this code in there:
@echo off echo Troubleshooting keyboard... powershell -ExecutionPolicy Bypass -Command "& {Get-WmiObject Win32USBControllerDevice | ForEach-Object{Wmi} | Where-Object {$.Description -like 'keyboard'} | ForEach-Object {$.Disable(); Start-Sleep -Seconds 2; $.Enable()}}
pause Save it as KeyboardFix.bat.
Right-click it and run as administrator.
Download and install Microsoft PowerToys.
Open PowerToys and go to Keyboard Manager.
Choose Remap a key and assign your media keys to their proper functions.
You can set up a toggle key for switching between media controls and F-keys.

Try testing in Windows Sandbox. This is a quick way to check if the issue is caused by something in your system or if it happens in a fresh environment too.
Go to Power Options and turn off USB Selective Suspend. This ensures your keyboard stays powered and doesn’t go into sleep mode.
If you’re using a laptop, plug in an external keyboard. If the external keyboard works, it’s probably a hardware issue with your laptop’s built-in keyboard.