 Method 1
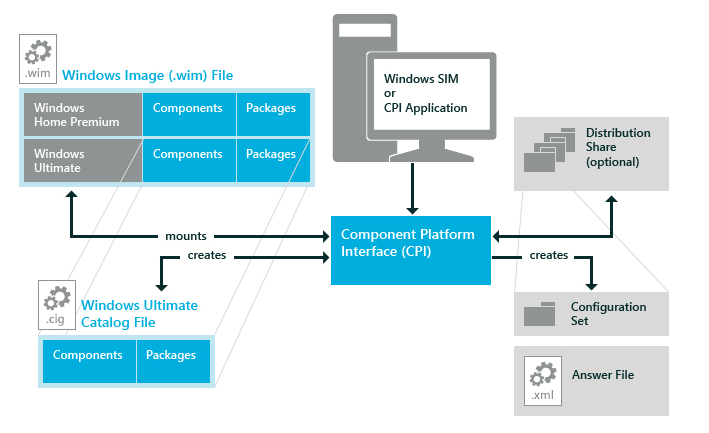
Windows System Image Manager (WSIM) is a tool from Windows ADK used to create automated Windows installation files (autounattend.xml). The process involves six key steps as provided below.
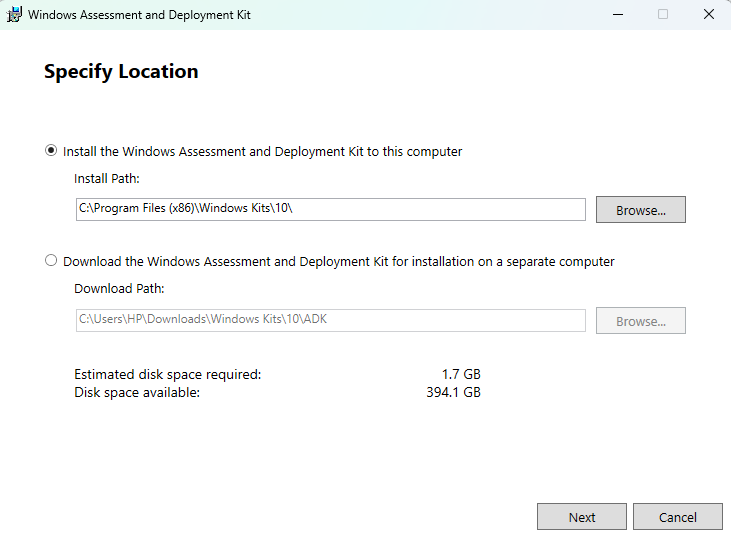
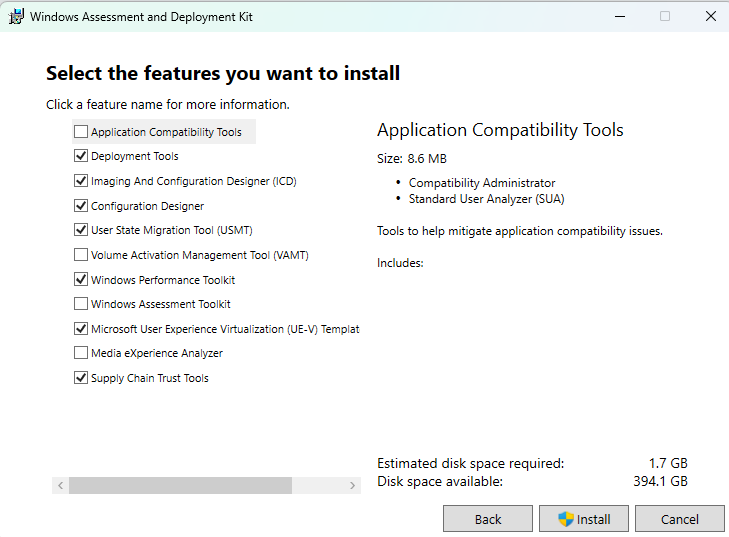
Install Windows ADK

Download the Windows ADK from Microsoft and include Deployment Tools during installation. This provides WSIM for creating the autounattend.xml file.
Mount Windows 11 ISO
Right-click the Windows 11 ISO and select Mount. In WSIM, go to File > Select Windows Image and browse for the install.wim file in the sources folder of the mounted ISO.
Create a New Answer File

In WSIM, select File > New Answer File. Add components like Disk Configuration, User Accounts, and Regional Settings from the Windows Image pane by right-clicking and selecting Add to Answer File.
Configure Disk Partitioning
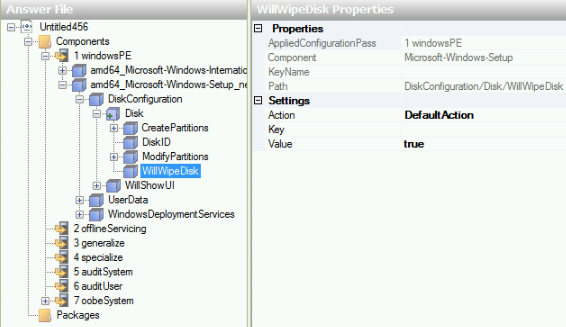
Go to Disk Configuration and define how Windows will partition the disk. Be careful, as incorrect settings can erase data.
Set Up Critical Settings
Under Microsoft-Windows-Shell-Setup, configure the computer name, user accounts, time zone, and language settings.
Validate and Save

Validate your answer file by selecting Tools > Validate Answer File. Save it as autounattend.xml. to your USB drive.
Info: Always validate your file using Tools > Validate Answer File.