WINDOWS 11

How to Fix "Autopilot.dll WIL Error" in Windows 11

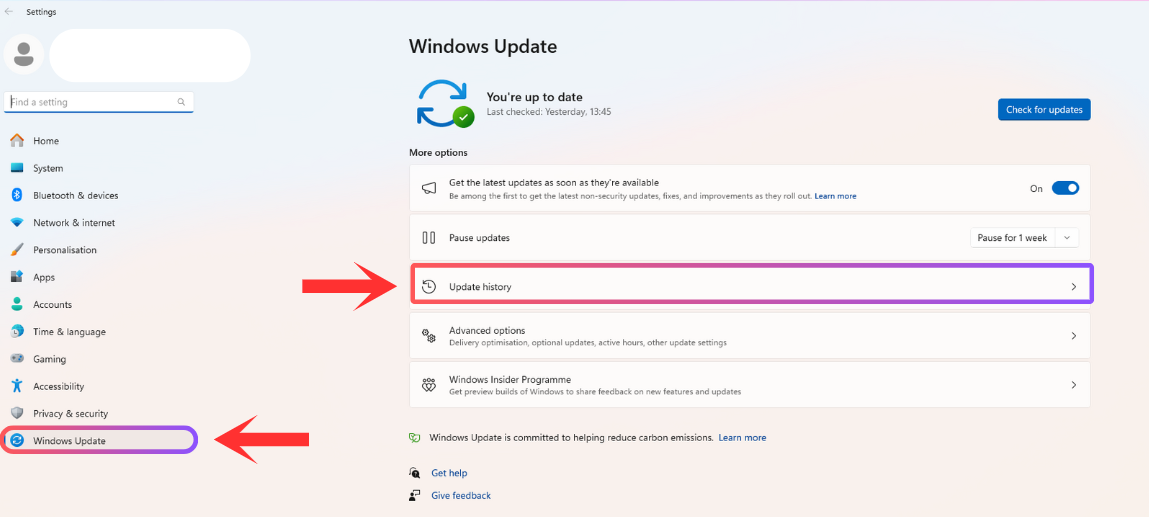
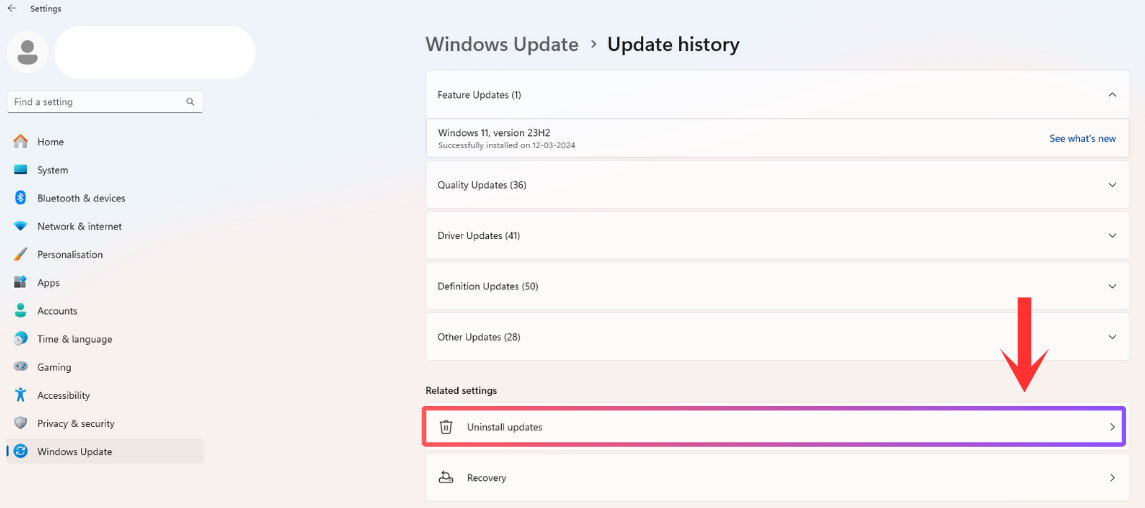
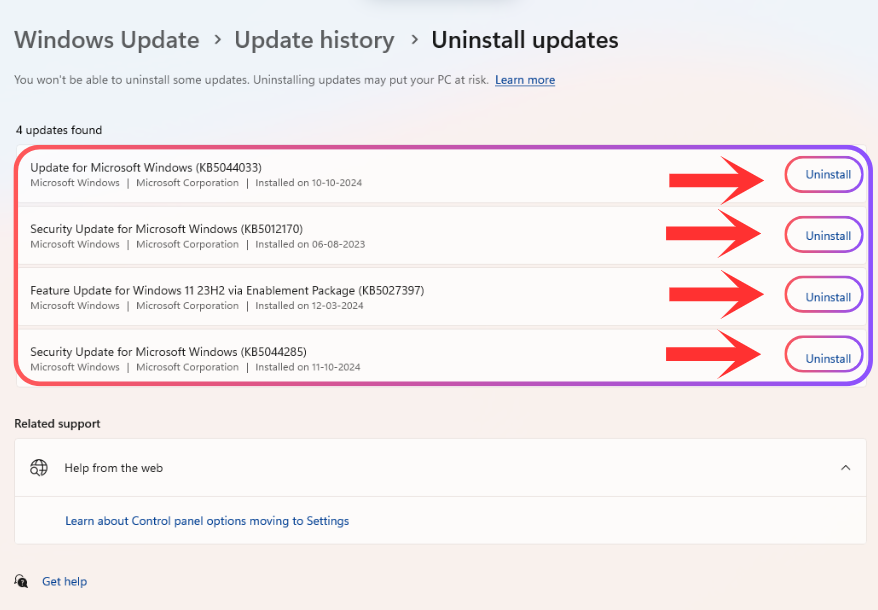
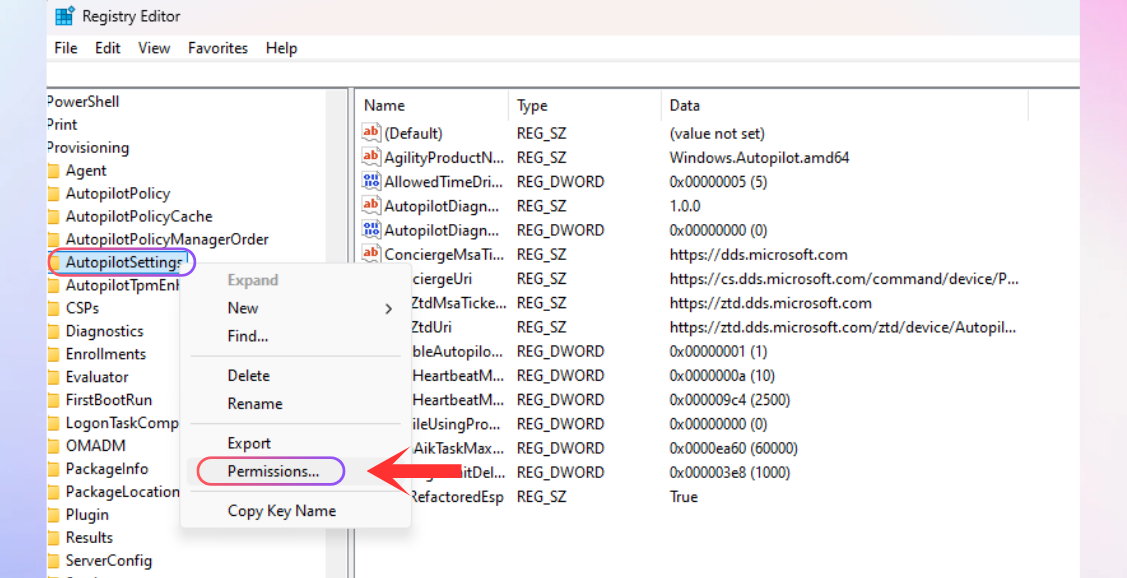
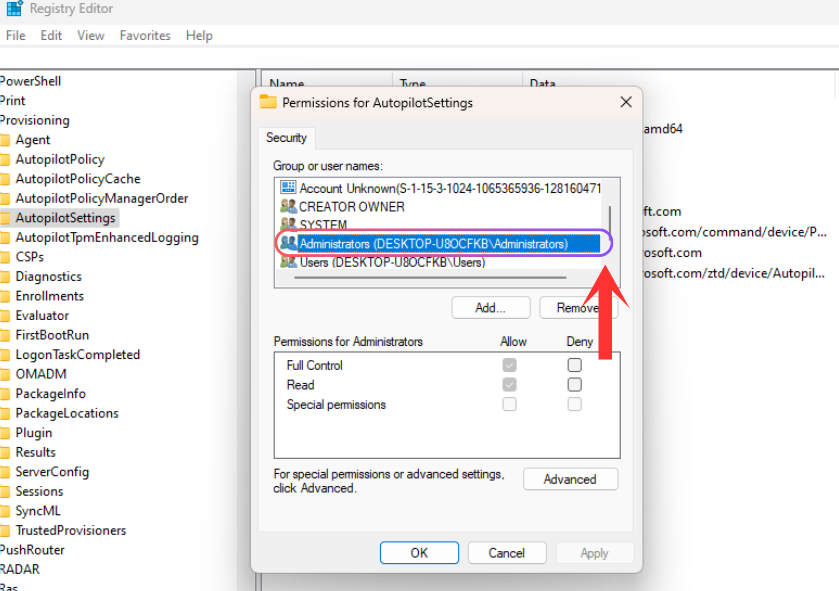
The "Autopilot.dll WIL Error" in Windows 11 happens when there are issues with system files or misconfigurations related to Windows Autopilot, which is important for setting up devices in a corporate environment. You might see this error during startup, updates, or when you're trying to use administrative tools, often with messages like "WIL error""autopilot.dll failed". The good news is that there are simple troubleshooting steps you can take to fix the problem.

Deepak Yadav

10/11/2024 15:15:33
Revert Recent Windows Update
  1. Press Win + I to open Settings.

  2. Navigate to Windows Update and click on Update History.

  3. Scroll down and select Uninstall updates.

  4. Find the most recent update related to Windows Autopilot or similar system components and click Uninstall.

  5. Restart your system and check if the error persists.

Disable automatic updates temporarily to avoid reinstallation of the problematic update until Microsoft releases a fix.

Resetting the Autopilot Service Configuration
  1. Open Command Prompt as an administrator.

  2. Type the following commands and press Enter after each:

    net stop autopilotservicesc config autopilotservice start= demandnet start autopilotservice

  3. Restart your computer.

If the service fails to start, run sfc /scannow in Command Prompt to repair system file corruption.

Running DISM and SFC Scans
  1. Open Command Prompt as an administrator.

  2. Run the following commands one after the other:

    DISM /Online /Cleanup-Image /RestoreHealthsfc /scannow

  3. Restart your computer after both scans complete.

Running DISM before SFC ensures a more thorough system file check.

Network Stack Reset with Autopilot Reconfiguration
  1. Open Command Prompt as an administrator.

  2. Run the following commands sequentially:

    netsh winsock resetnetsh int ip resetipconfig /releaseipconfig /renewipconfig /flushdns

  3. Restart your PC.

  4. Open PowerShell as administrator and enter:

    Install-Module -Name WindowsAutopilotIntune -ForceConnect-MSGraph`Get-AutopilotDevice

This method resets both the network and Autopilot settings, resolving communication issues between the device and Microsoft services.

Autopilot Cache Clearing
  1. Open File Explorer and navigate to:

    C:\ProgramData\Microsoft\Autopilot

  2. Delete all files inside this folder.

  3. Open PowerShell as an administrator and run:

    `Get-AutopilotDiagnostics

  4. Check the diagnostics file, and based on errors, run:

    Reset-AutopilotConfig

  5. Restart your PC.

Review the AutopilotDiagnostics.txt file for specific error codes to pinpoint problematic components.

Registry Optimization for Autopilot Components
  1. Press Win + R, type regedit, and press Enter.

  2. Navigate to:

    HKEY_LOCAL_MACHINE\SOFTWARE\Microsoft\Provisioning\AutopilotSettings

  3. Right-click Autopilot, select Permissions, and change the Owner to the Administrators group.

  4. Give the Administrators group Full Control permissions.

  5. Delete any keys with names starting with Error or Failure.

  6. Restart your PC.

Always back up the registry or create a system restore point before making any registry changes.

Bonus Tips
  1. Keep Windows Updated: Ensure your system is running the latest Windows 11 updates for optimal Autopilot performance.

  2. Verify Autopilot Device Enrollment: If managed by Intune, ensure the device enrollment is correct.

  3. Check Firewall Settings: Ensure that the firewall isn't blocking Autopilot communications with Microsoft servers.

  4. Cloud Backup: Regularly back up your system settings and data to a cloud service for easy restoration if needed.