WINDOW 11

How to Change Time Clock to 24-Hour or 12-Hour Format in Windows 11

1 SOLUTIONS
FEBRUARY 13, 2025

Windows 11 offers flexible customization for displaying time in either the 12-hour (AM/PM) or 24-hour (military) format, catering to personal preferences, regional norms, or workplace requirements. This guide outlines a practical method for seamlessly adjusting the time format via the Settings app.

Deepak Yadav
Deepak Yadav

Personal Preference

Match your familiarity (e.g., 24-hour for clarity, 12-hour for AM/PM distinction).

Work/Regional Standards

Align with workplace requirements or regional norms.

Consistency

Sync with other devices or software using a specific format.

Advertisement

Change Time Format via Windows Settings

7 STEPS EASY 2 MIN

1/1

METHOD
Method 1
Overview

Modify your system's time format using Windows Settings.

Method 1 of 1

Open Settings

Press Win + I to launch Settings.

Method 1 of 1
Step 1 of 7

Go to Time & Language

In the left sidebar, click Time & language.

Method 1 of 1
Step 2 of 7

Open Language & Region

Select Language & region.

Method 1 of 1
Step 3 of 7

Click on Regional Format

Scroll down to the Region section and expand Regional format.

Method 1 of 1
Step 4 of 7

Change the Date & Time Format

Click Change formats.

Method 1 of 1
Step 5 of 7
Step 6

Modify Short and Long Time Format 

For 12-hour format: Choose options with AM/PM (e.g., h:mm tt or hh:mm tt). 

For 24-hour format: Select formats without AM/PM (e.g., H:mm or HH:mm).

Method 1 of 1
Step 6 of 7

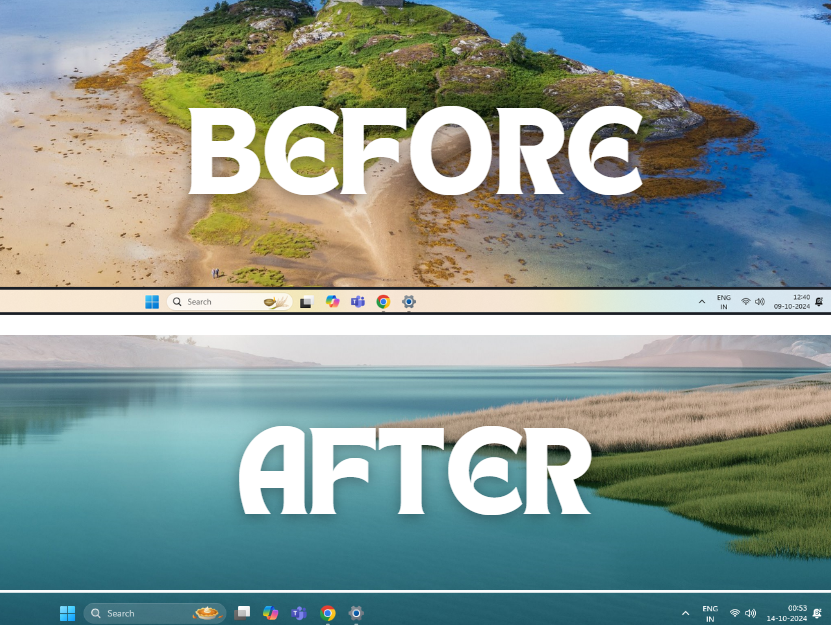
Changes Apply Automatically

The system will update the time format immediately.

Method 1 of 1
Step 7 of 7

Additional Tips

Image

Some apps (e.g., Outlook, third-party widgets) may retain old settings—adjust them separately.

If using automatic time sync, ensure your region matches the desired format to prevent conflicts

Methods (1)

Change Time Format ...
7 Steps