 Method 1
📌 Why This Works: A fresh installation replaces corrupted or missing files, ensuring proper audio functionality.
 Step 1
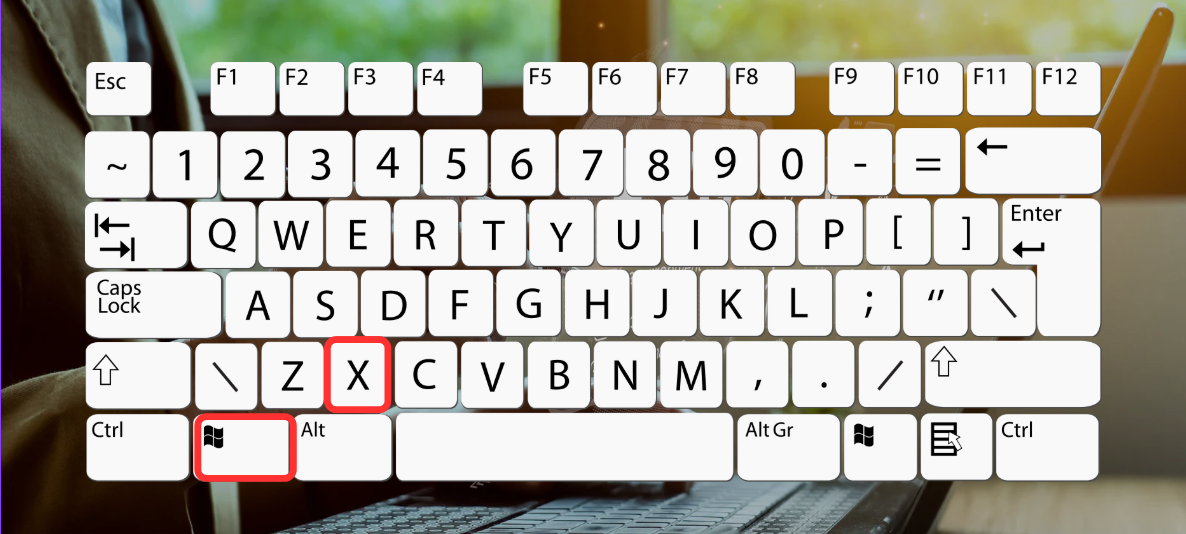
Open Device Manager

Press Win + X → Select Device Manager.
Uninstall Driver
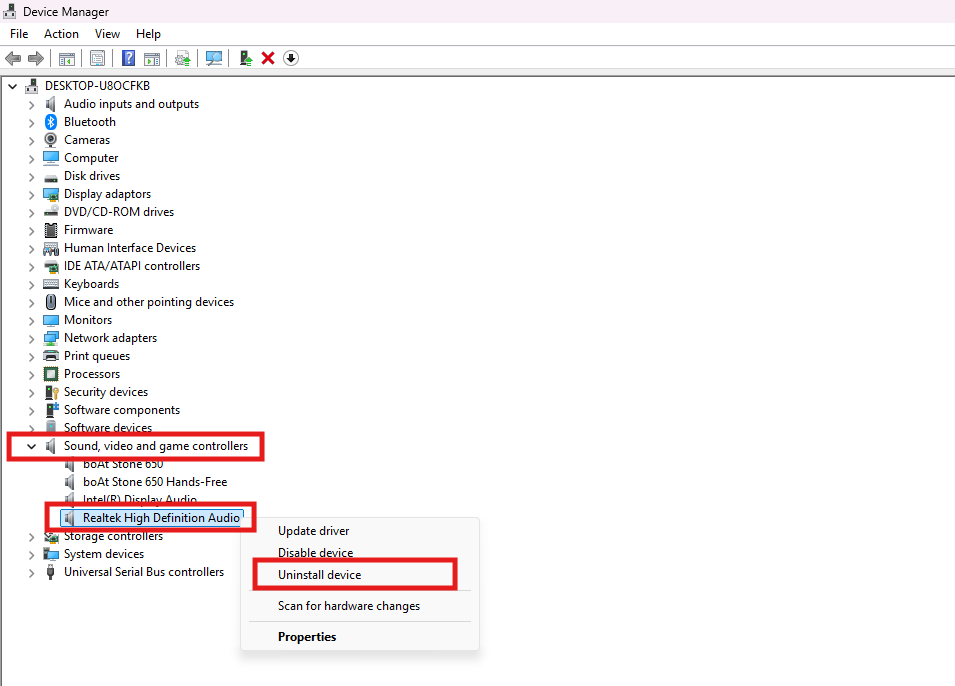
Expand Sound, Video, and Game Controllers → Right-click Realtek High Definition Audio → Select Uninstall device.
Confirm Deletion
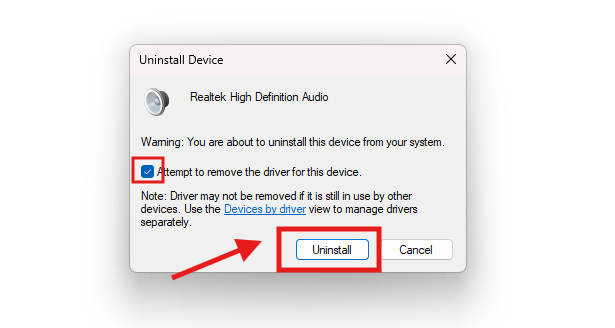
Tick Attempt to remove the driver for this device. → Click Uninstall.
Note: Driver may not be removed if it is still in use by other devices. Use the Devices by driver view to manage drivers separately.
Restart PC

Restart your computer to remove the driver completely.
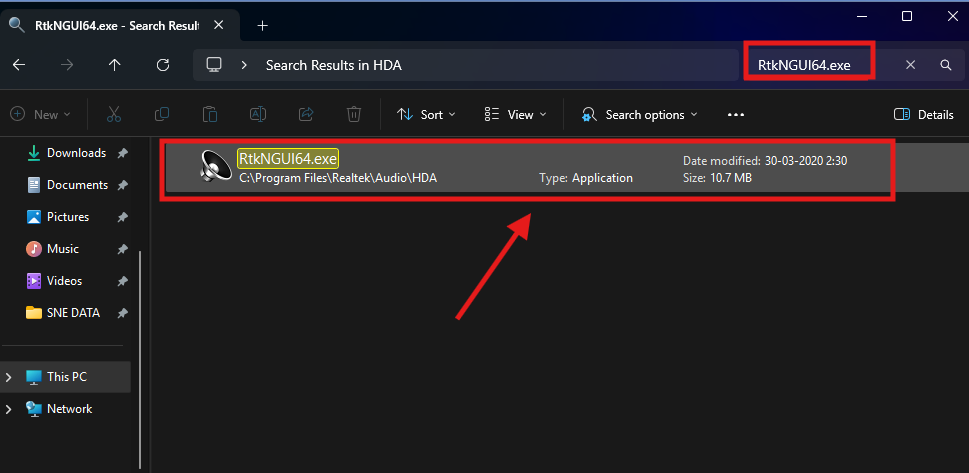
Download & Install New Driver

Get the latest Realtek HD Audio Driver from your PC/laptop manufacturer’s website (e.g., Dell, HP, Lenovo).
Install & Restart Again
Run the installer → Complete installation → Restart PC.
Disable antivirus temporarily: Some security tools block driver installations.