WINDOW 11

How to Fix Realtek Not Working in Windows 11 (Mic, Headphones & Wi-Fi)

5 SOLUTIONS
MARCH 03, 2025

You can fix your Realtek audio or Wi-Fi issues on Windows 11 by updating outdated drivers, BIOS settings, or disabled services, which could be the cause. Follow the step-by-step methods with pro tips to fix Realtek issues and restore full functionality in minutes.

Deepak Yadav
Deepak Yadav

Expert, Head of Windows Circle

Hardware Check

Verify your mic, headphones, or Wi-Fi adapter is properly connected.

Windows Updates

Install the latest Windows 11 updates (Settings > Windows Update).

Admin Rights

Ensure you have administrator access to modify system settings.

Reinstall Realtek Drivers Using Device Manager

5 STEPS EASY 2 MIN

1/5

METHOD
Method 1
Overview

If your Realtek audio or Wi-Fi is acting up, it’s often due to old or glitchy drivers. Reinstalling gives you a clean slate.

Method 1 of 5
Next Method

Open Device Manager

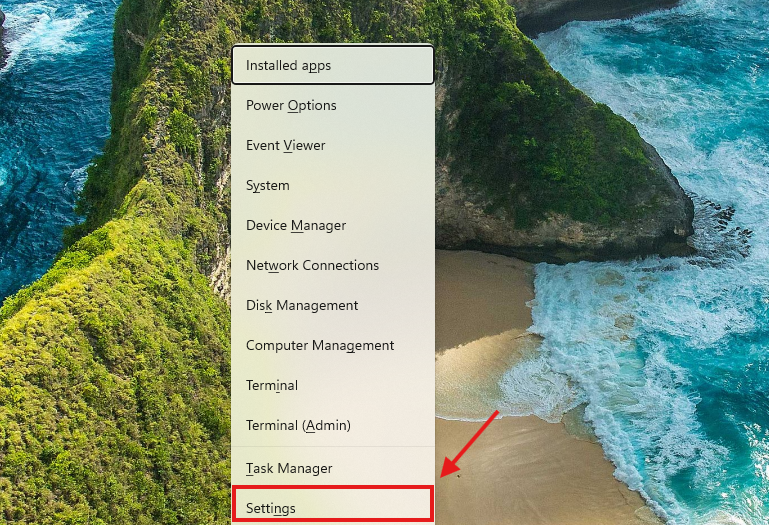
Press Win + X → Select Device Manager.

Method 1 of 5
Step 1 of 5

Expand the Correct Category

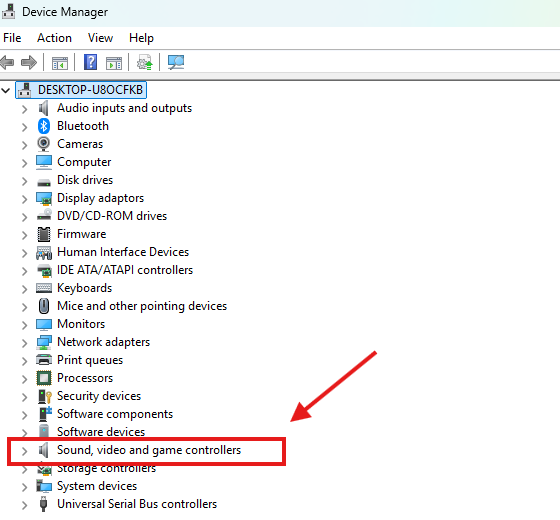
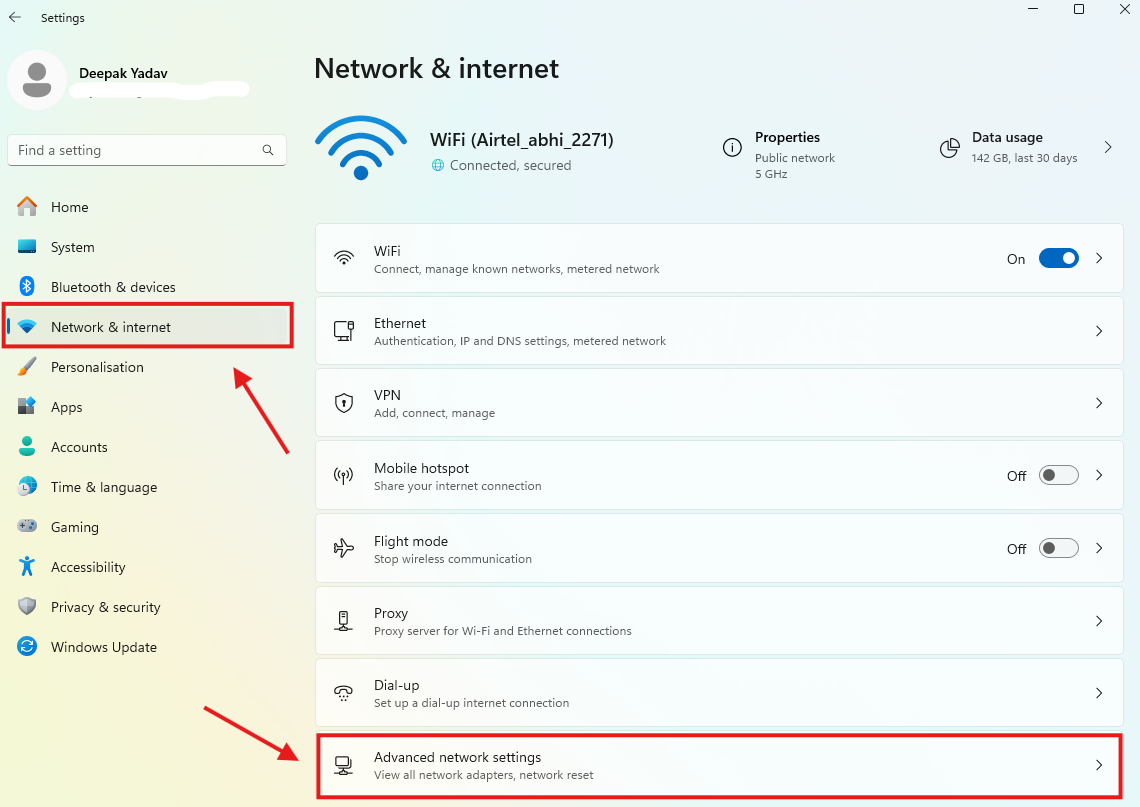
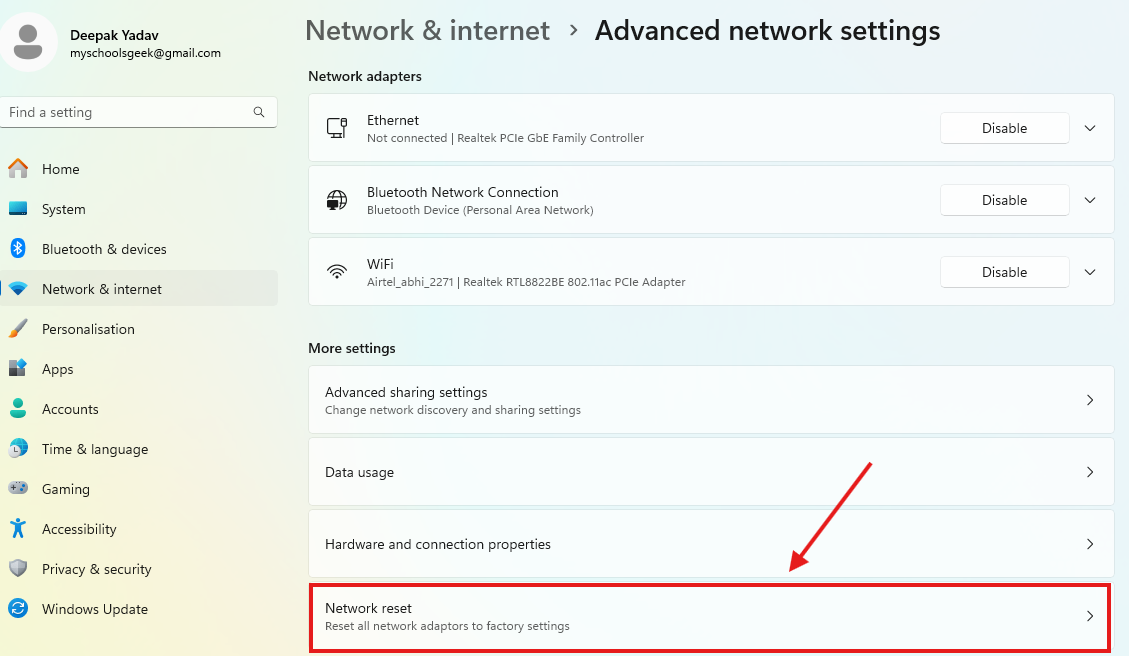
Choose Sound, video, and game controllers for audio issues or Network adapters for Wi-Fi.

Method 1 of 5
Step 2 of 5

Uninstall Driver

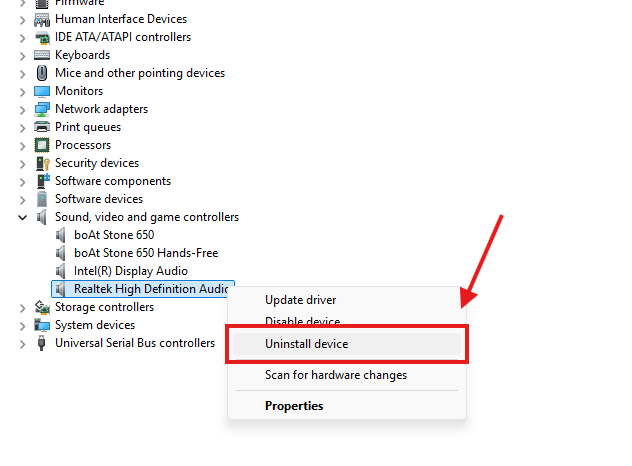
Right-click your Realtek Audio or Wi-Fi adapter → Select Uninstall device.

Method 1 of 5
Step 3 of 5

Delete Driver Software

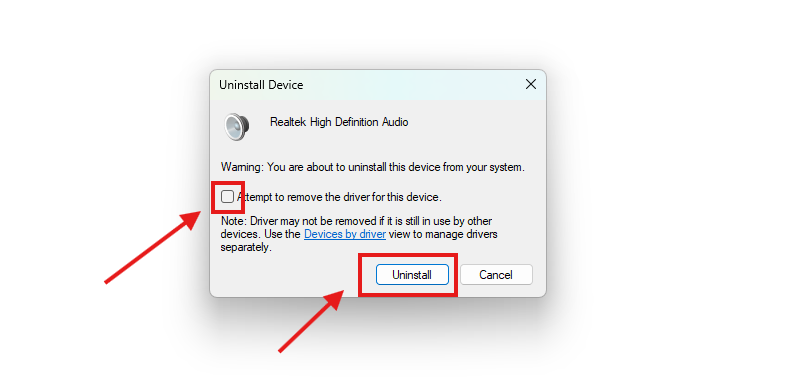
Check the box for Delete the driver software for this device, then click Uninstall.

Method 1 of 5
Step 4 of 5

Restart Your PC

Windows will auto-install fresh drivers.

Quick tip: If Windows doesn’t do it for you, grab the driver directly from your laptop brand’s support site. Avoid generic ones—they can be flaky!

Method 1 of 5
Step 5 of 5

Turn On Realtek Devices in BIOS

4 STEPS EASY 2 MIN

2/5

METHOD
Method 2
Overview

Realtek devices rely on background Windows services. If those crash, your gear might ghost you.

Method 2 of 5
Next Method

Restart Your PC

As it boots, spam F2, F10, or Del (varies by brand) to enter BIOS.

Method 2 of 5
Step 1 of 4

Find Advanced Settings

Navigate to Advanced Settings or Integrated Peripherals.

Method 2 of 5
Step 2 of 4

Enable Realtek Device

Look for Onboard Audio or Wi-Fi Adapter and set it to Enabled.

Method 2 of 5
Step 3 of 4

Save & Exit

Press F10 to save changes and restart.

FYI: If your BIOS feels ancient, update it from your manufacturer’s website. It might fix weird compatibility issues!

Method 2 of 5
Step 4 of 4

Restart Windows Audio & Wi-Fi Services

4 STEPS EASY 2 MIN

3/5

METHOD
Method 3
Overview

If your Realtek Wi-Fi refuses to connect, messy network settings could be the culprit.

Method 3 of 5
Next Method

Open Services

Press Win + R, type services.msc, and hit Enter.

Method 3 of 5
Step 1 of 4

Find Services

Scroll to Windows Audio (for sound) or WLAN AutoConfig (for Wi-Fi).

Method 3 of 5
Step 2 of 4

Restart Service

Right-click the service and hit Restart.

Method 3 of 5
Step 3 of 4
Step 4

Set to Automatic

Open Properties, set Startup type to Automatic, and reboot.

Still stuck: Run the Windows Troubleshooter (Settings > System > Troubleshoot) for a quick diagnosis.

Method 3 of 5
Step 4 of 4

Reset Network Settings (Wi-Fi Fix)

4 STEPS EASY 2 MIN

4/5

METHOD
Method 4
Method 4 of 5
Next Method

Open Settings

Press Win + I and go to Network & Internet.

Method 4 of 5
Step 1 of 4

Navigate

Click Advanced network settings > Network reset.

Method 4 of 5
Step 2 of 4

Reset

Hit Reset now and confirm.

Method 4 of 5
Step 3 of 4

Restart

Reboot your PC to apply changes.

Note: You’ll need to re-enter Wi-Fi passwords and set up VPNs/proxies again afterward.

Method 4 of 5
Step 4 of 4

Set Realtek as the Default Audio Device

4 STEPS EASY 2 MIN

5/5

METHOD
Method 5
Overview

Windows may be overlooking your Realtek microphone or headphones and using a different device instead.

Method 5 of 5

Open Settings

Press Win + X and select Settings.

Method 5 of 5
Step 1 of 4

Go to Sound

Navigate to System > Sound.

Method 5 of 5
Step 2 of 4

Set Output

Under Output, pick Realtek Audio or your speakers.

Method 5 of 5
Step 3 of 4

Set Input

Under Input, choose Realtek Microphone.

No Realtek listed: Right-click in the sound settings and enable Show Disabled Devices to unhide it!

Method 5 of 5
Step 4 of 4

Additional Tips

Disable Third-Party Audio Enhancements: Some apps like Dolby, Nahimic, or DTS can conflict with Realtek—disable them in Control PanelSoundPlaybackPropertiesEnhancements.

Use a Powered USB Hub for External Realtek Devices: If using a Realtek USB sound card or Wi-Fi adapter, plug it into a powered USB hub to avoid low power issues on laptop ports.

Manually Assign a Static Channel for Realtek Wi-Fi: If Wi-Fi keeps disconnecting, set a static channel (1, 6, or 11) in your router settings instead of auto-selection to reduce interference.