WINDOWS 11

How to Pin 'This PC' to Windows 11 Taskbar

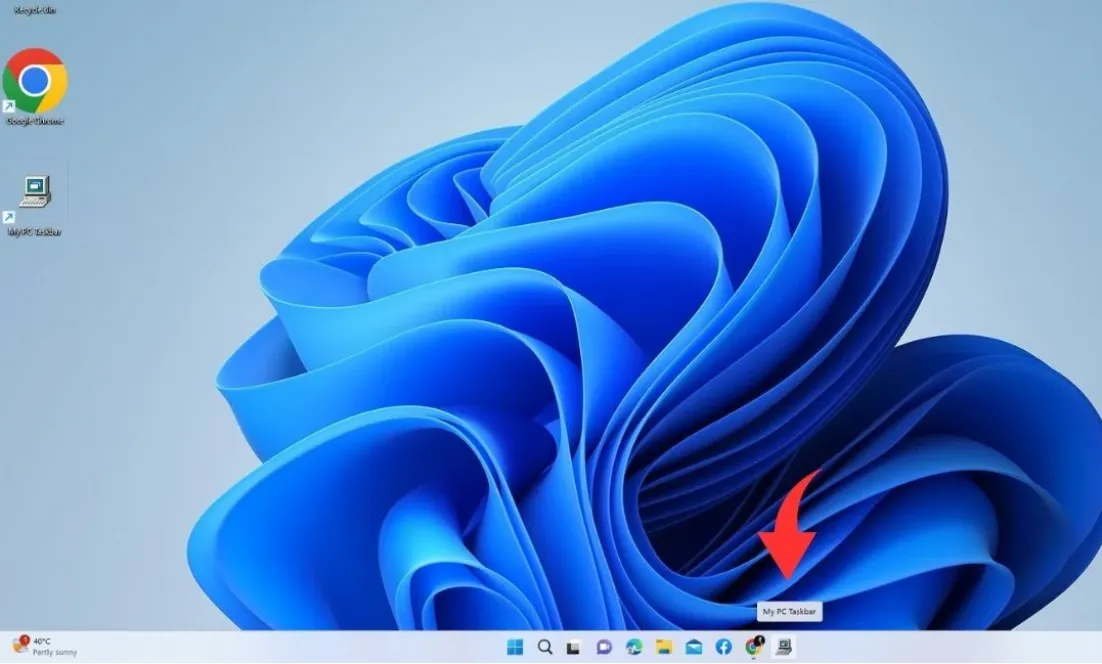
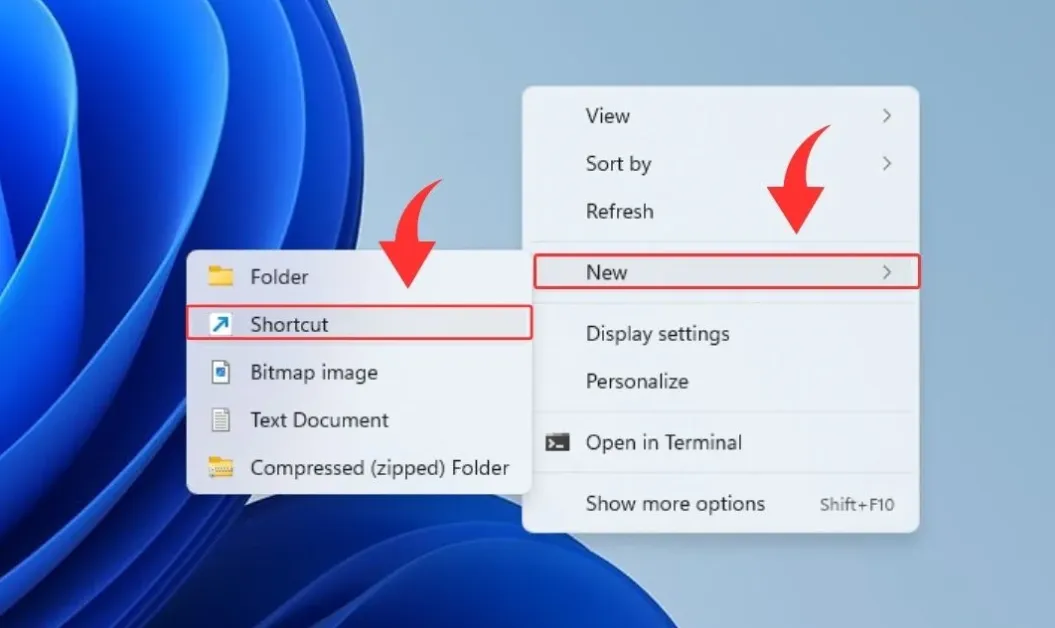
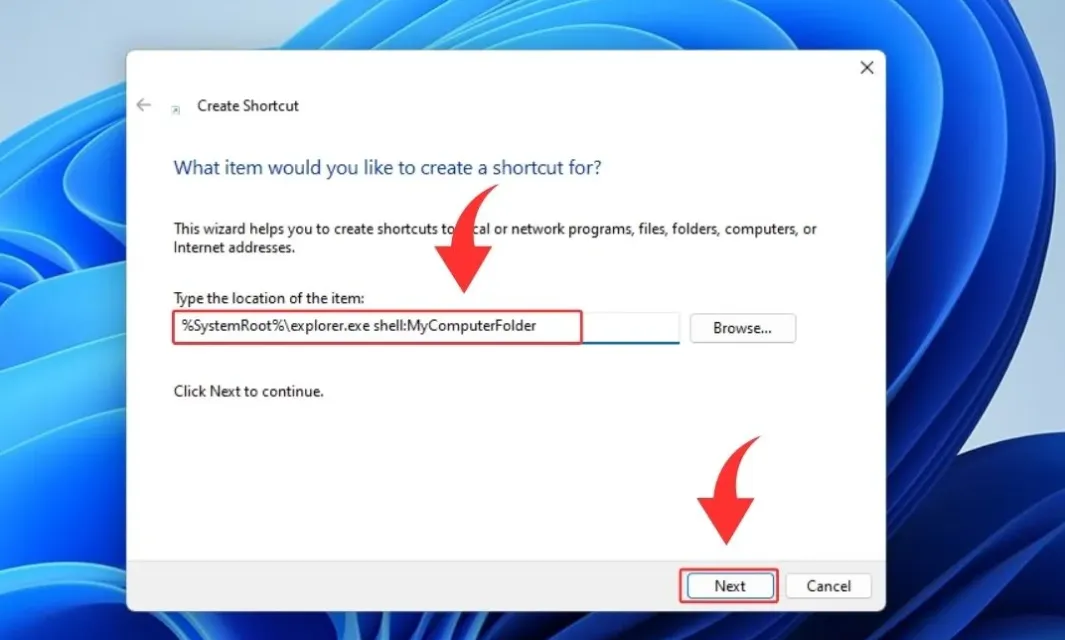
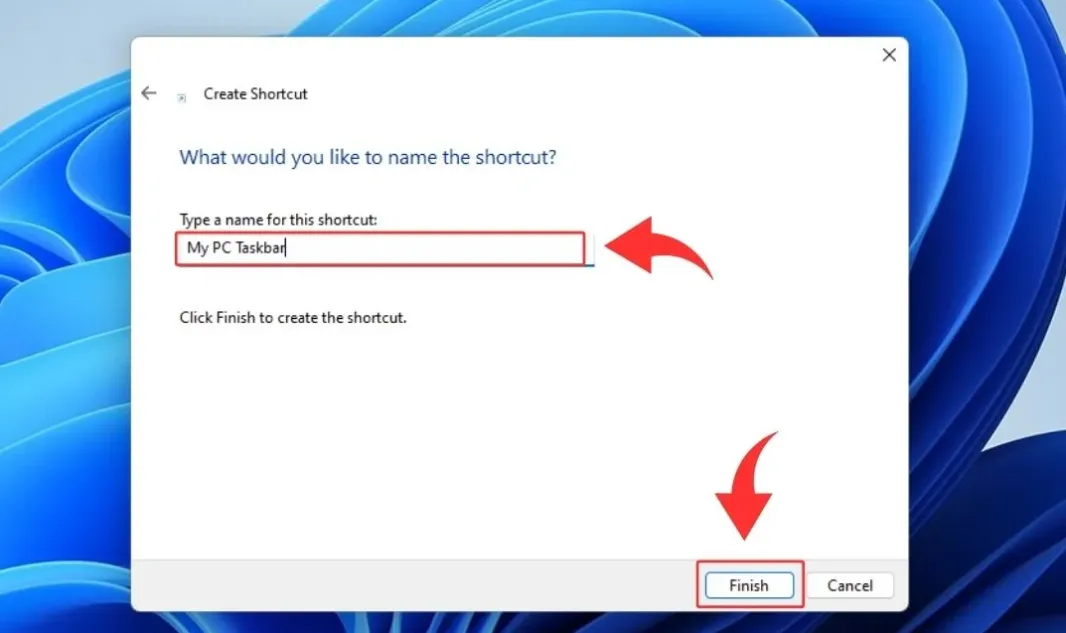
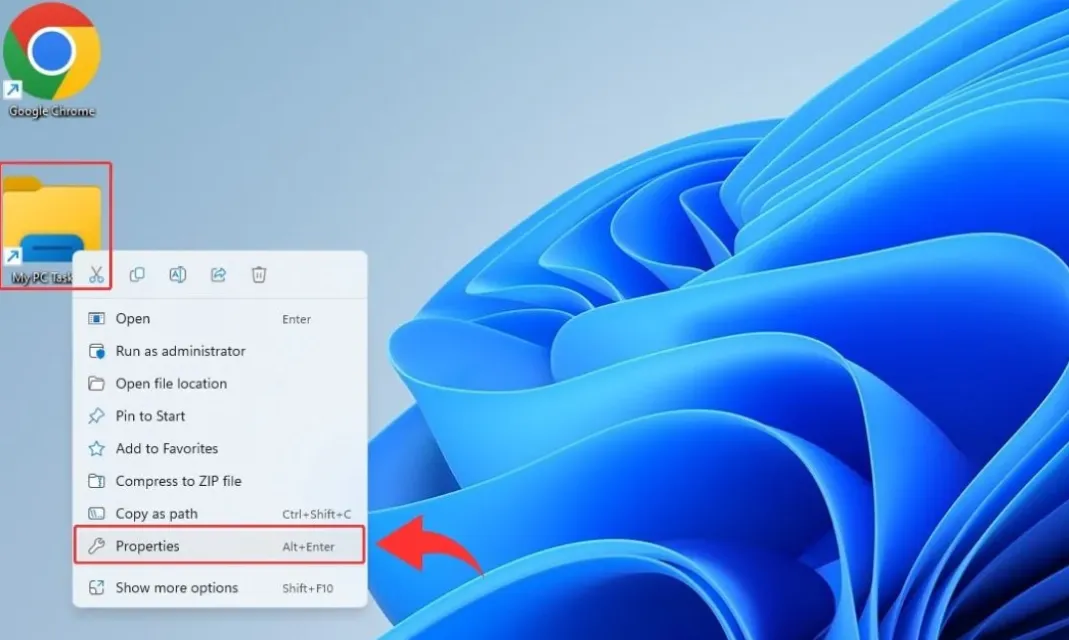
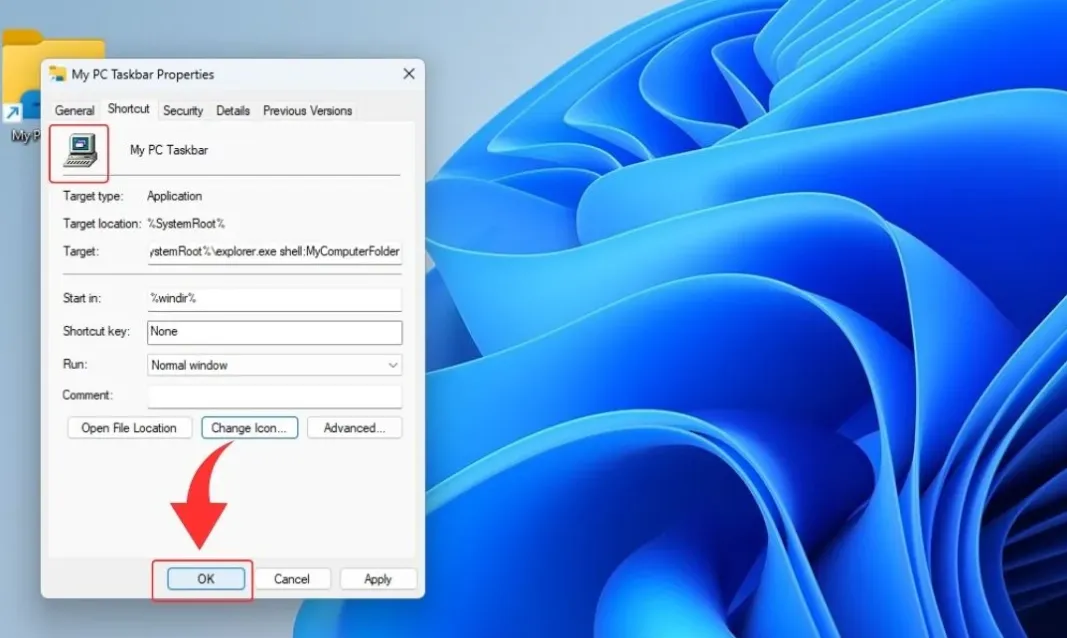
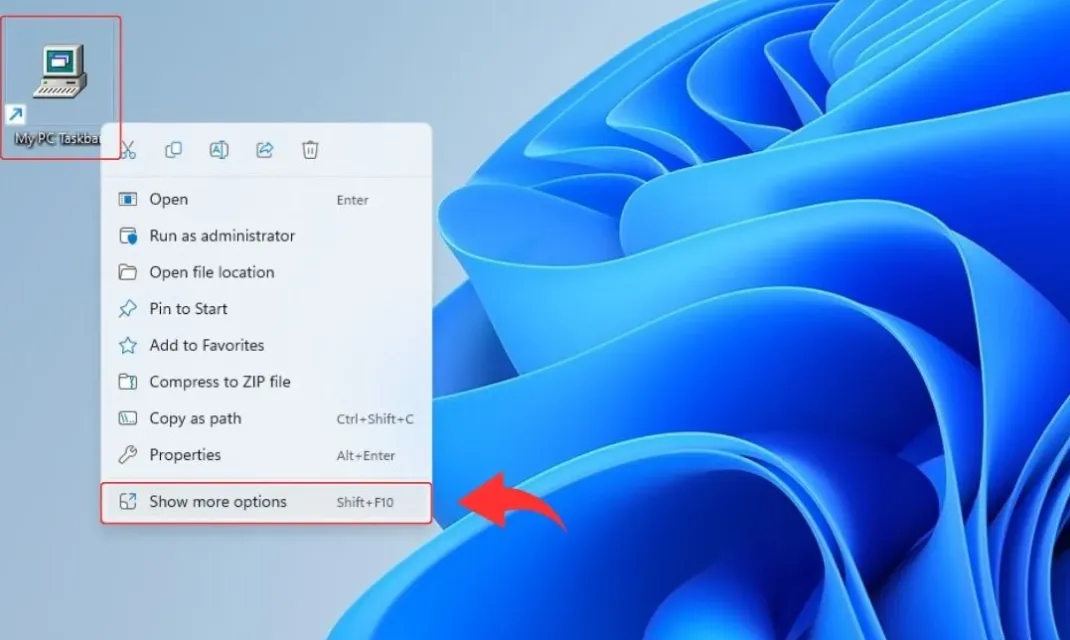
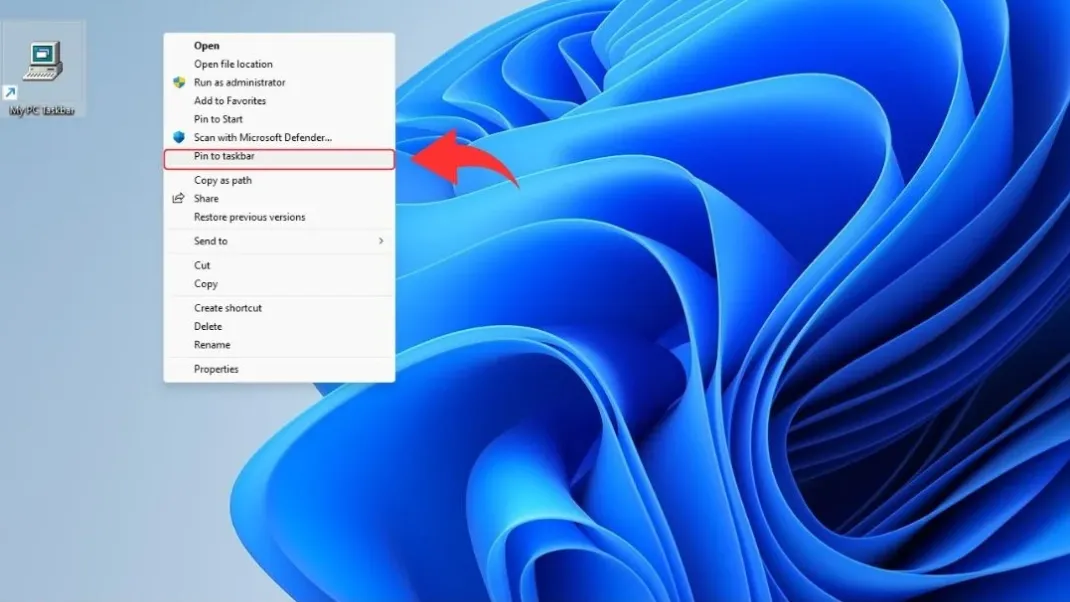
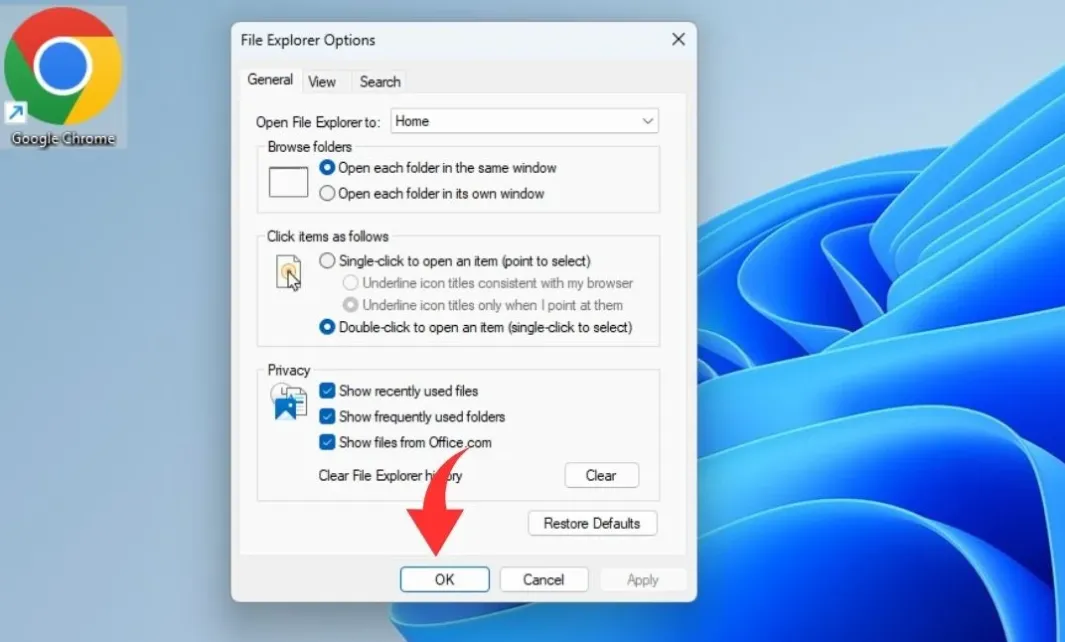
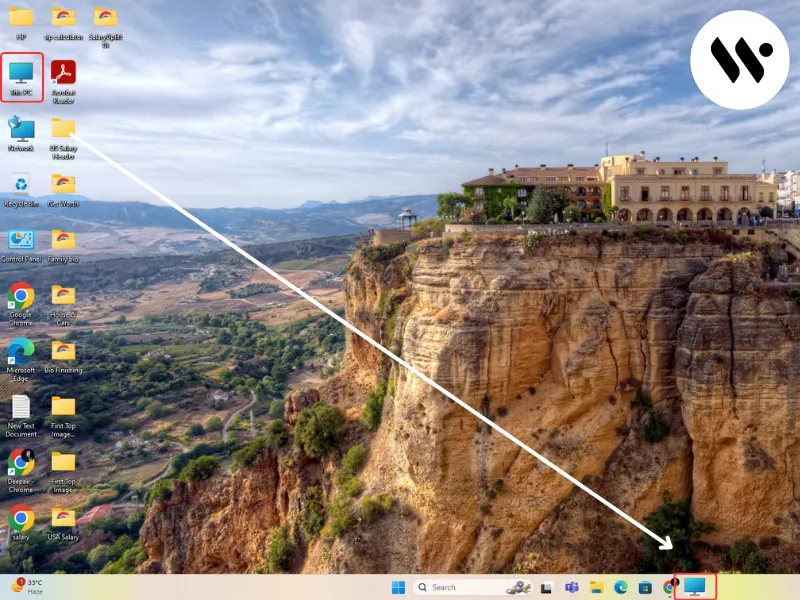
Windows 11 doesn't provide a direct option to pin 'This PC' to the taskbar, but there are workarounds to achieve similar functionality. This guide will walk you through two methods to effectively pin 'This PC' to your Windows 11 taskbar.

Deepak Yadav

08/26/2024 20:00:00
Create a Custom Shortcut
OK
  1. Create the shortcut:

    • Right-click on an empty area of your Windows 11 desktop.
    • Select "New" > "Shortcut". Shortcut
    • In the location field, paste: %SystemRoot%\explorer.exe shell:MyComputerFolder
    • Click "Next".
    • SystemRoot
    • Name the shortcut (e.g., "My PC Taskbar") and click "Finish".
    • SystemRoot
  2. Customize the shortcut icon:

    • Right-click on the newly created shortcut.
    • Shortcut
    • Select "Properties".
    • Click the "Change icon" button.
    • Properties
    • Choose the "Computer" icon or a custom icon of your preference.
    • Click "OK" to save changes.
    • Change icon
  3. Pin to taskbar:

    • Right-click on the shortcut.
    • Select "Show More Options".
    • Show More Options
    • Click "Pin to taskbar".
    • Pin to taskbar

You can create multiple shortcuts for different folders or drives and pin them individually to the taskbar for quick access to specific locations.

Modify File Explorer Default View
  1. Open File Explorer Options:

    • Press Win + S to open the search box.
    • Type "File Explorer Options" and open it.
    • File Explorer Options
  2. Change default view:

    • In the "General" tab, find "Open File Explorer to:".
    • Select "This PC" from the dropdown menu.
    • Click "Apply" then "OK".
    • Apply
  3. Pin File Explorer to taskbar:

    • If not already there, search for "File Explorer" in the Start menu.
    • Right-click on File Explorer.
    • Select "Pin to taskbar".

If changes don't take effect immediately, try restarting File Explorer from the Task Manager (Ctrl + Shift + Esc).

PowerShell Method
  1. Launch PowerShell as Administrator

  2. Execute the following command:

    $WshShell = New-Object -ComObject WScript.Shell
    $Shortcut = $WshShell.CreateShortcut("$env:APPDATA\Microsoft\Windows\Start Menu\Programs\ThisPC.lnk")
    $Shortcut.TargetPath = "explorer.exe"
    $Shortcut.Arguments = "shell:::{20D04FE0-3AEA-1069-A2D8-08002B30309D}"
    $Shortcut.IconLocation = "%SystemRoot%\System32\imageres.dll,109"
    $Shortcut.Save()
  3. Pin to Taskbar: Right-click on the new shortcut in Start Menu and select "Pin to taskbar"

This method allows for extensive customization. You can modify the icon, name, or even add additional parameters to the shortcut.

Hidden Windows Features Method
  1. Press Win + R, type "shell:AppsFolder", hit Enter

  2. Locate "This PC" in the opened folder

  3. Right-click on "This PC" and select "Create shortcut"

  4. Click "Yes" to place the shortcut on the desktop

  5. Right-click the new desktop shortcut and select "Pin to taskbar"

This method works for many system tools and can be used to create quick access to various Windows features.

Group Policy Method
  1. Press Win + R, type "gpedit.msc", hit Enter

  2. Navigate to: User Configuration > Administrative Templates > Start Menu and Taskbar

  3. Find and double-click "Pin 'This PC' to Taskbar"

  4. Set it to "Enabled" and click "Apply" then "OK"

  5. Restart your computer or sign out and back in

Group Policy can be used to enforce this setting across multiple machines in a network environment.

Bonus: Taskbar Optimization Tips
  • Use taskbar folders: Enable "Combine taskbar buttons" in Taskbar settings to create app groups

  • Leverage Jump Lists: Right-click pinned items for quick access to recent files or common actions

  • Customize taskbar corner icons: In Taskbar settings, under "Taskbar corner icons," choose which system icons appear

  • Use keyboard shortcuts: Win + [Number] opens the corresponding pinned app on your taskbar